One major problem users face with the Jekyll blog is adding new posts. While writing a new post using markdown language, adding a new image or formatting the blog post could be difficult.
Admin dashboard was one standout feature for WordPress which made life simple. Especially the bloggers who migrate from wordpress to Jekyll find this as a disadvantage.
But there is an option to add an admin dashboard to your Jekyll blog.
- Open Jekyll directory
-
Open config.yml file in any text editor and add the below command under plugins and save it.
`- jekyll-admin`
-
Open ‘GemFile’ in any text editor and add the below command under ‘group :jekyll_plugins do’.
`gem "jekyll-admin"`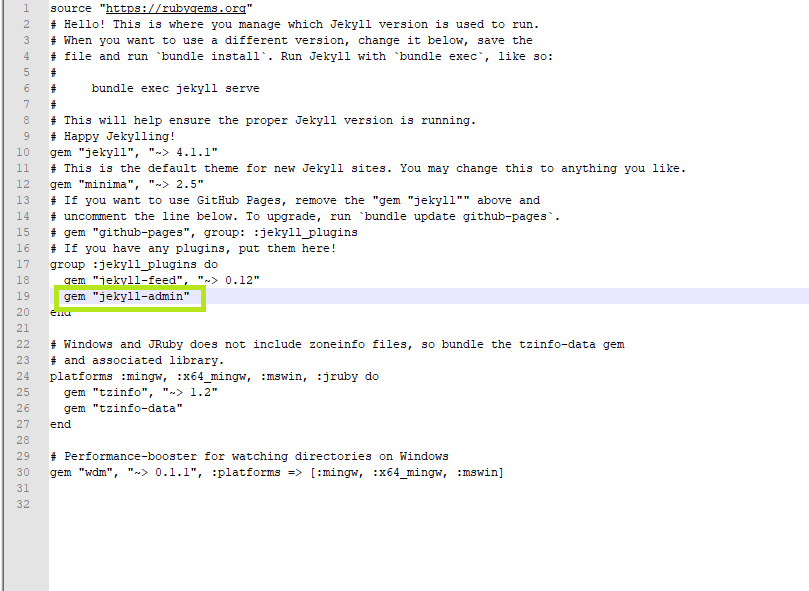
-
Open the command prompt and navigate to your jekyll blog directory and execute the below command.
`bundle exec jekyll serve`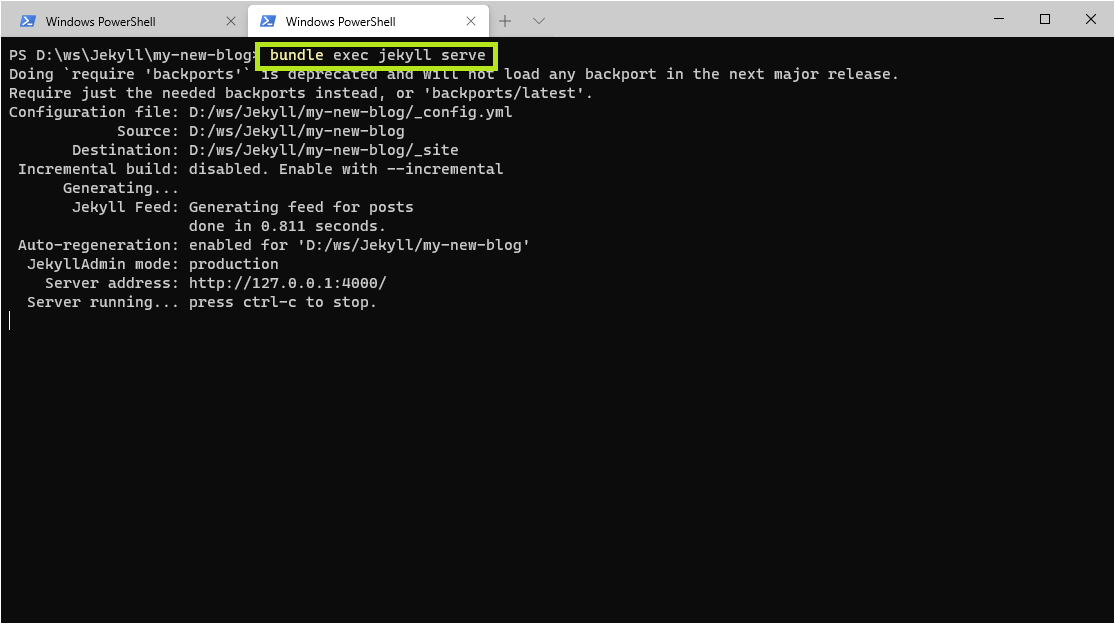
Now this will deploy your blog in localhost. -
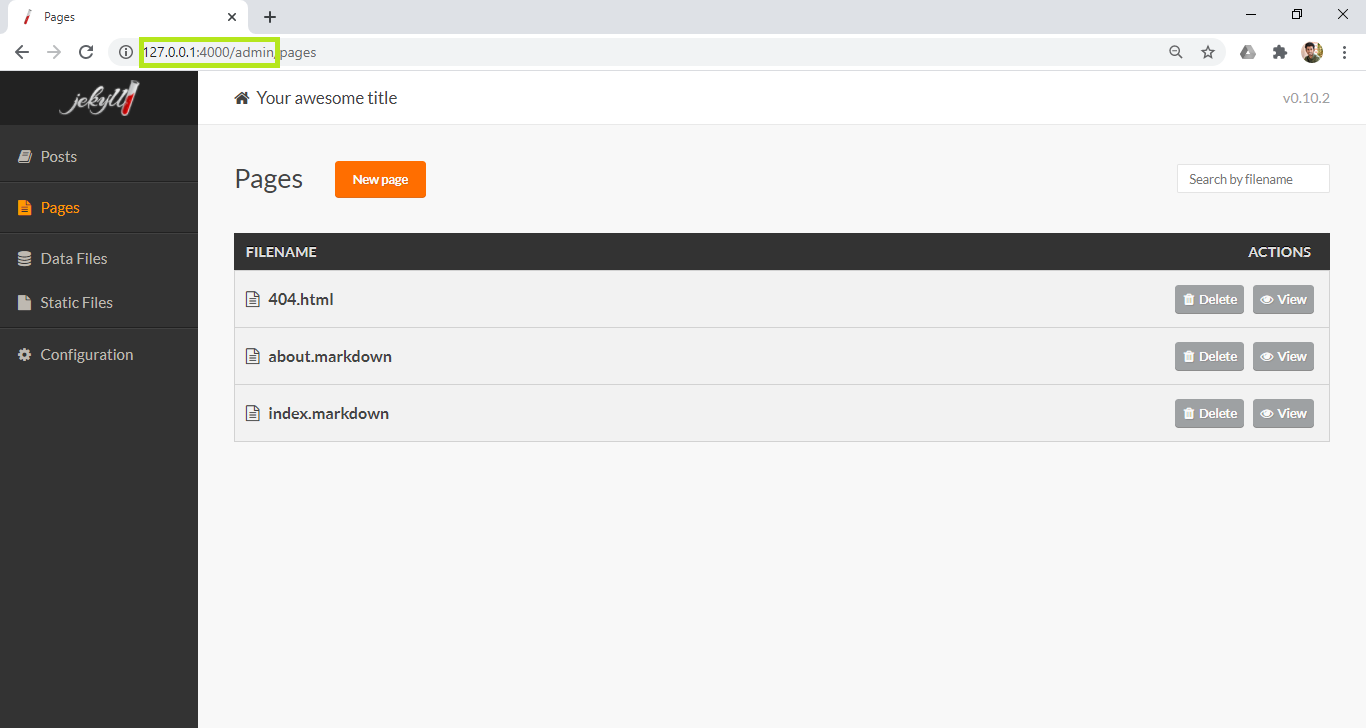
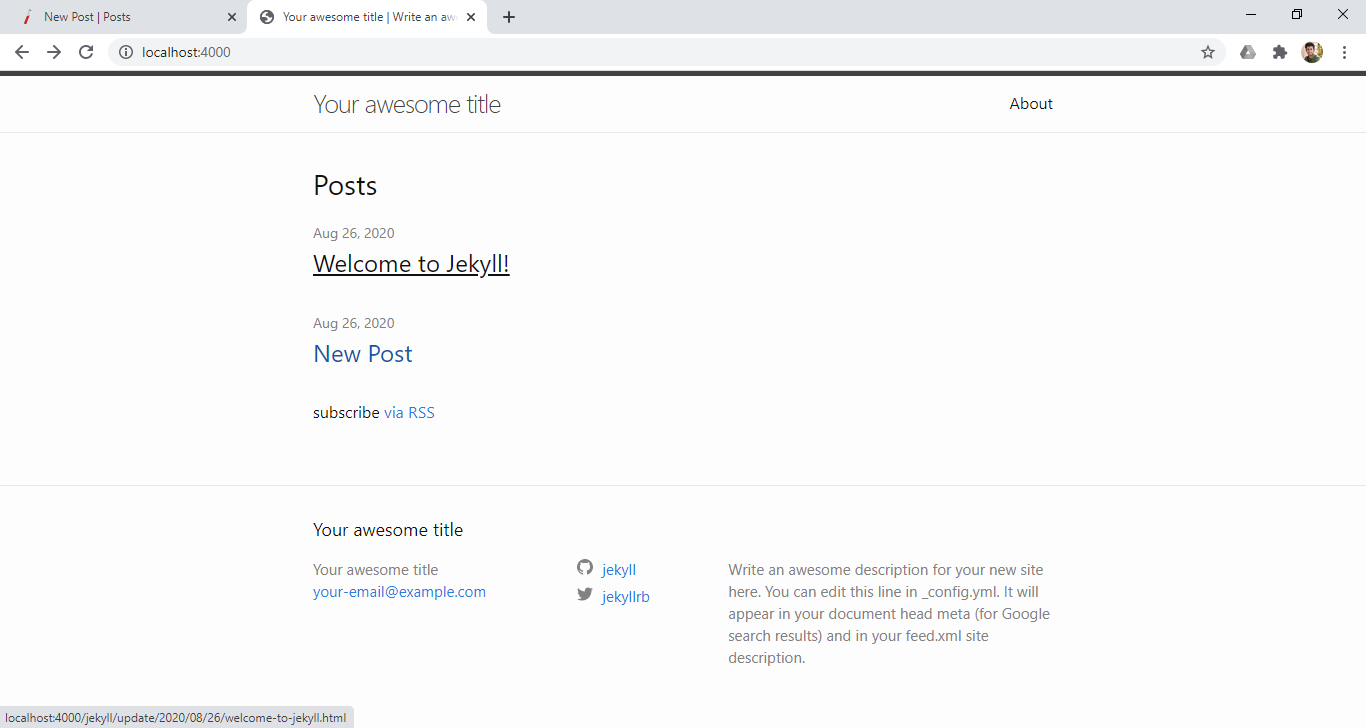
Open any web browser and navigate to http://localhost:4000/admin or http://127.0.0.1:4000/admin to view the admin dashboard.
-
Click on Posts in the left sidebar to create a new post. Input all the necessary details and click on create.

-
Now navigate to http://localhost:4000/ or http://127.0.0.1:4000 to view your blog and the post you have created will be visible in the blog.


Start the conversation