
A sitemap is an important component of any website or blog, including a Jekyll blog. Sitemap is a valuable tool for improving the visibility, usability, and maintenance of your Jekyll blog. It can help you attract more visitors, keep them engaged, and ensure your blog is running smoothly.
Creating a sitemap for a Jekyll blog is relatively easy. You can follow these steps:
Create a new file called sitemap.xml in the root directory of your Jekyll blog.
Open the file and add the following code:
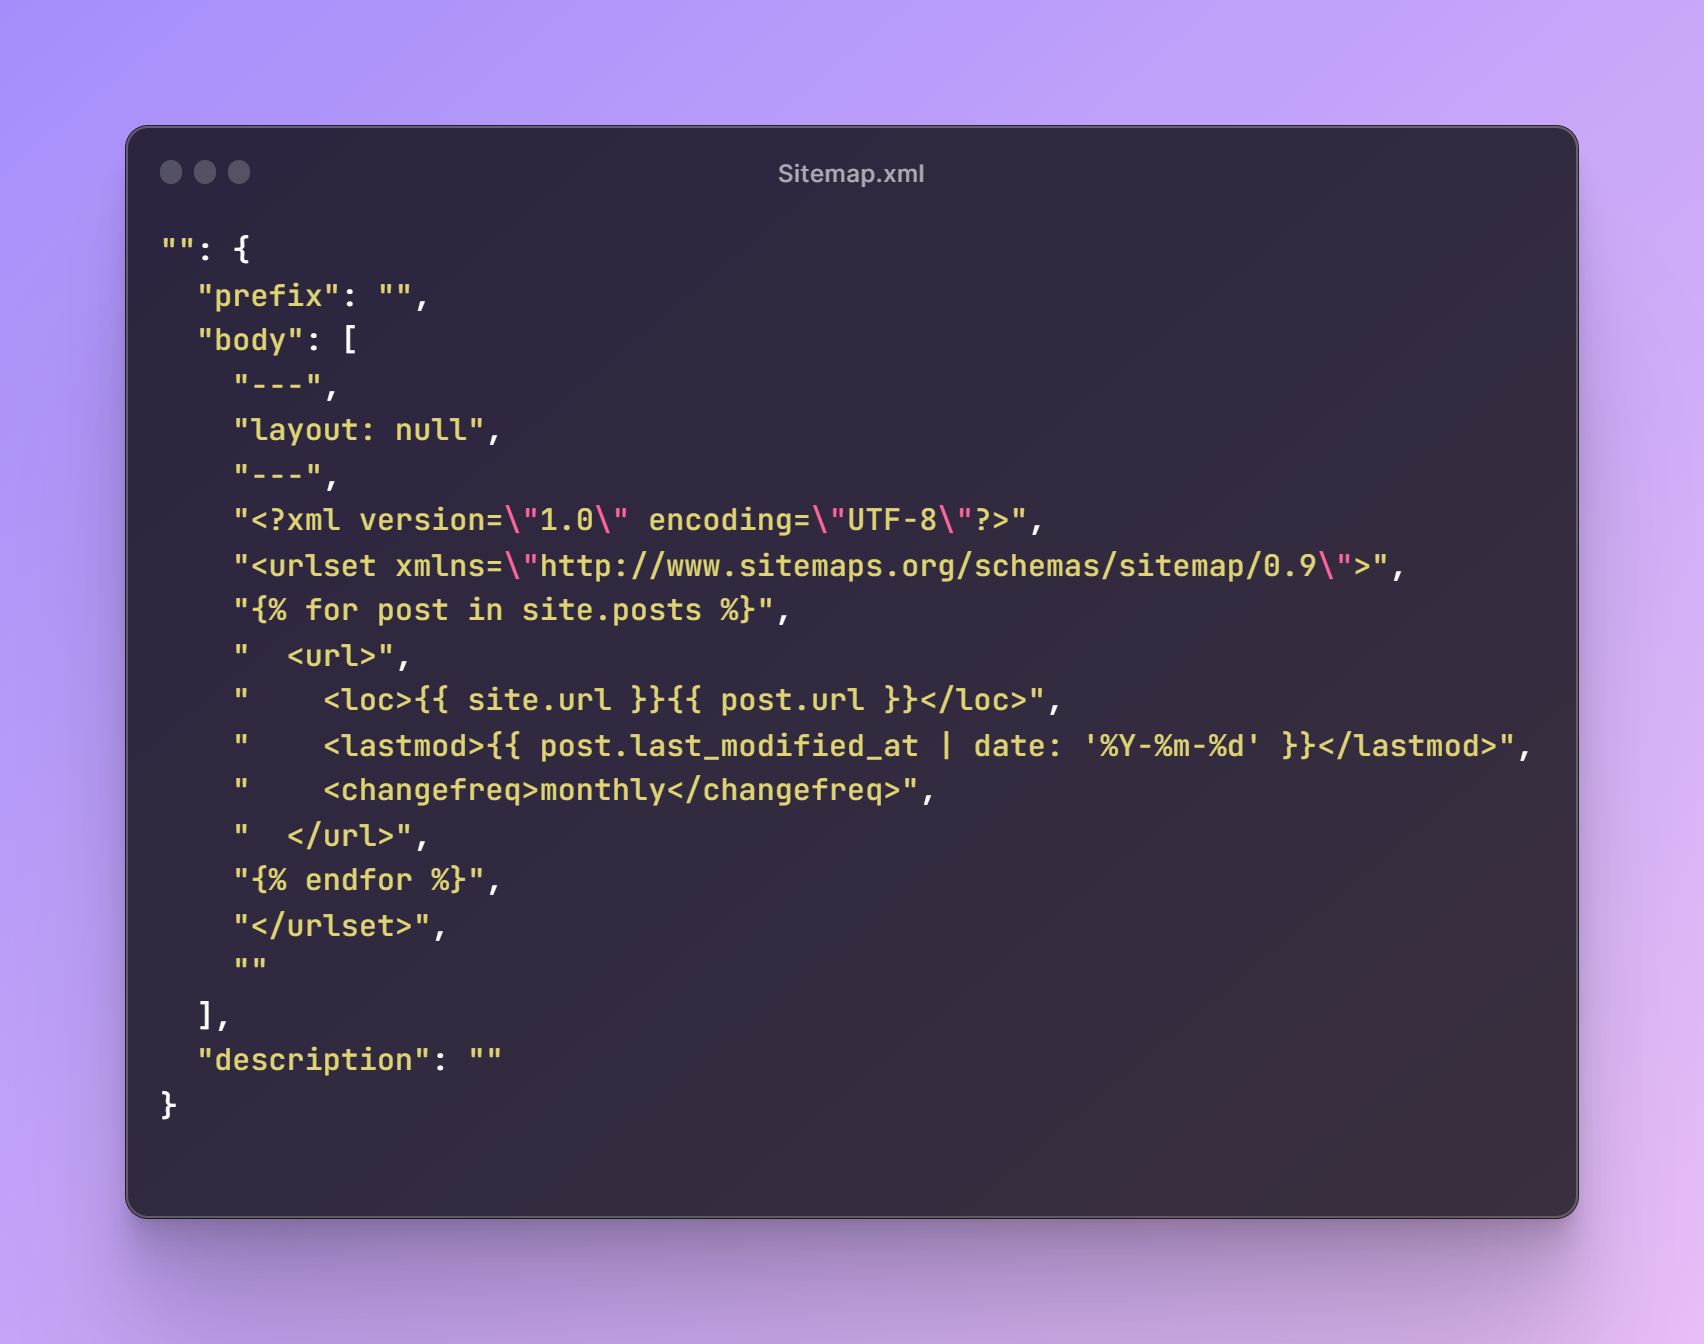
Here I have added the code as png since the blog is already running on Jekyll platform and the code would function and generate the response for my blog. You can download the file from here.
This code generates a sitemap with all the posts on your blog.
Save the file and push it to your blog’s repository.
Submit your sitemap to search engines. You can do this by adding the following line to your robots.txt file:
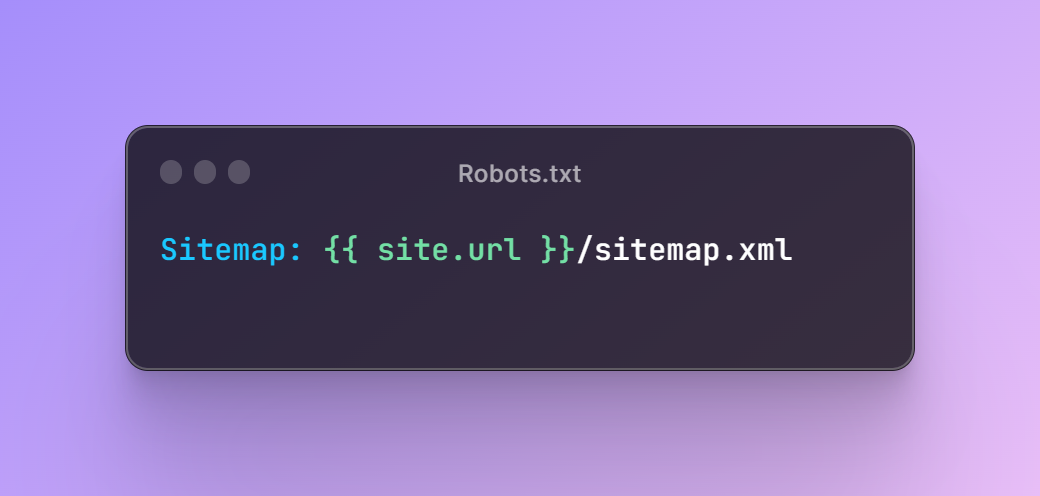
This tells search engines where to find your sitemap.
Test your sitemap using a tool like Google’s Search Console to make sure it’s working correctly.


Start the conversation